WiFi IP camera configuration
Powering the camera
Connect the camera to the appropriate power supply.
Wired connection to the existing network
In the first phase the wireless IP camera must be connected to the LAN (the router) with a patch cable, and you proceed similarly to a wired IP camera to enter its web configuration interface.
Searching and adding a WiFi network
In the web configuration go to Settings > Advanced settings, the WiFi tab, and click Search. From the list of found WiFi networks select and tick the one you want the camera to join.
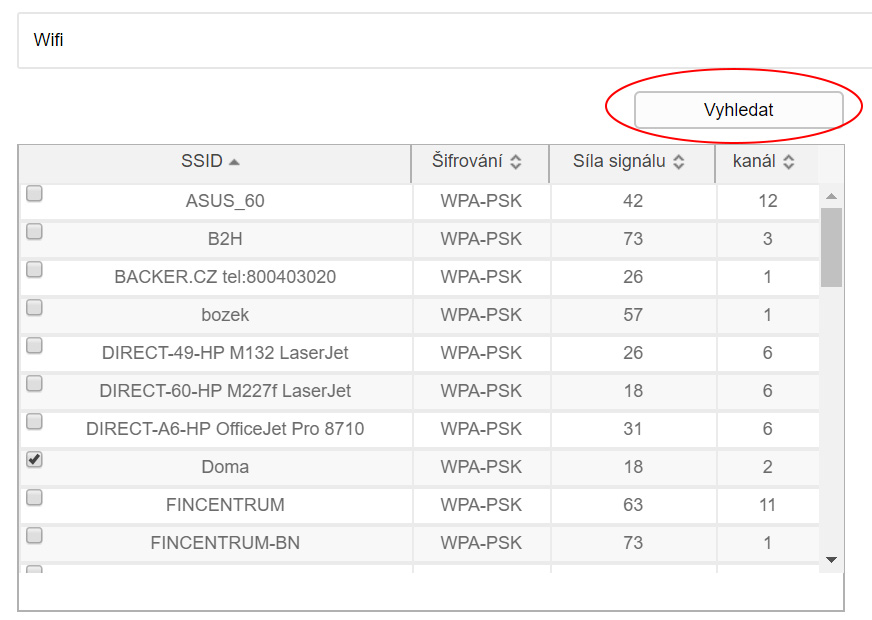
At the bottom of the screen, fill in the password (key) for the chosen WiFi network. Ticking DHCP assigns the camera an IP address automatically from the router's DHCP server. If you don't tick this option you can configure the camera's network parameters manually (for advanced users). Clicking Save stores the entered details and the camera connects wirelessly.
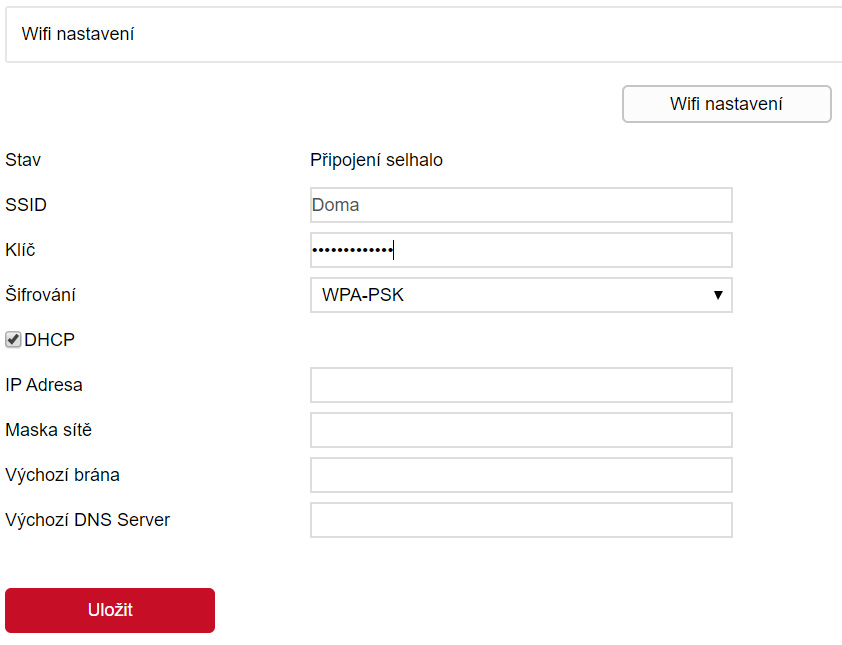
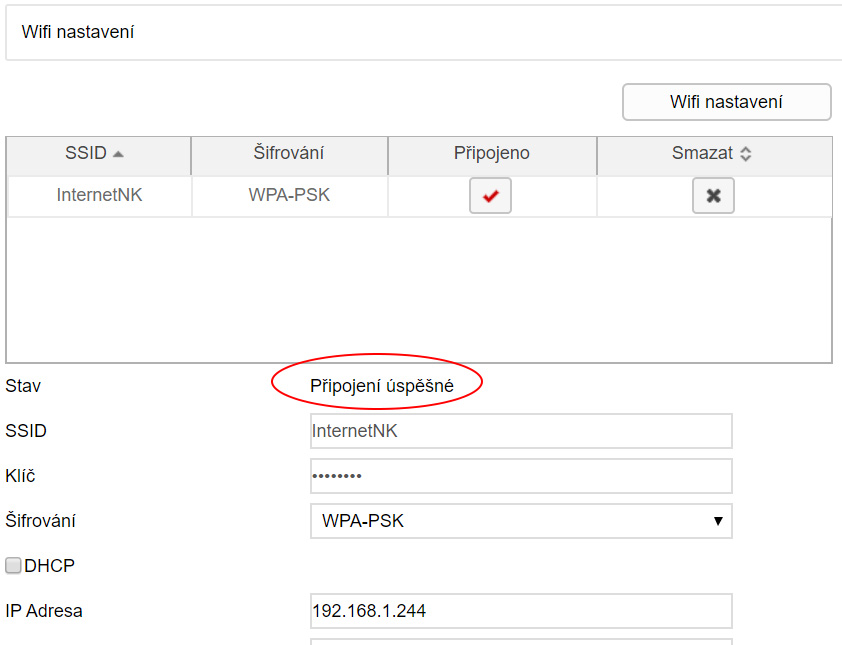
You can verify a successful WiFi login by refreshing the page about 20 seconds after saving — the system will display a confirmation that login to the chosen network succeeded.
If you want to view the camera remotely on a phone or computer (over the internet), the WiFi network must be connected to the internet.